

|
You can do this project in just about any sequence you want but we started with the supports. It depends on how big your container is as to how big you make your bottom stand and middle stand. Based on our recommendation of 1/4 on the bottom, 1/2 in the middle and 1/4 on top, we made our support 8" high. Measure the distance from side to side of the container 8" up from the bottom, or whatever height you use. Taking into account the spacing of two 90 degree elbows and the kris cross in the middle cut 4 pieces of 3/4" PVC. Cut 4 more 3/4" pieces of PVC 8" long. Glue these together as shown for the lower support. 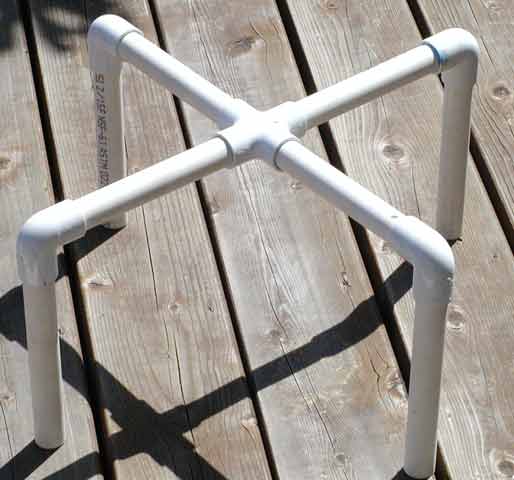 Again assemble them as shown above. Cut the square grid material into circles that fit on top of the supports. Make them so that they fit very close to the containers sides. 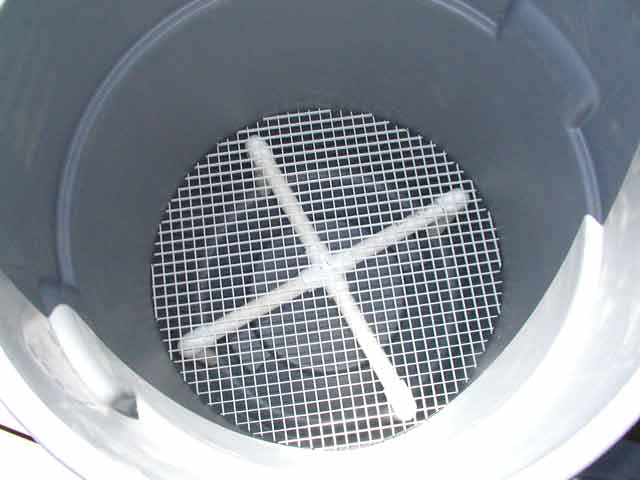 The inlet tube will come in through the side near the top and go down near the middle to the bottom of the tank. Drill the hole as close to the top as possible with the lid on the tank. The fittings we used were a 1" 90 degree elbow, 1" male adapter, 1" female adapter, garden hose fitting and 1" PVC pipe. We also cut a 1/4" thick piece of wood for filler and drilled a hole in it. You may be able to find a bulkhead adapter but this was our fix. This sequence is important because if you need to remove things from the tank you will need to first remove the inlet pipe. This arrangement puts the threaded male fitting to the outside of the tank making removal of the pipe much easier. 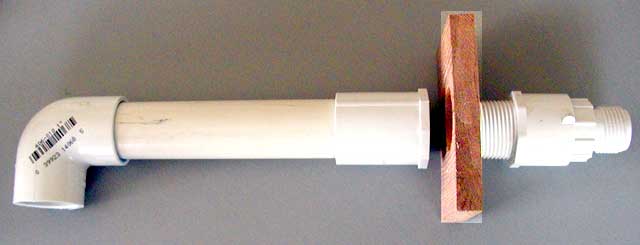 Measure the distance from the inlet elbow down to the bottom of the tank. Cut a 1" piece of PVC tubing to that length. Cut a couple of "V" notched in the bottom and drill some holes but no higher than the bottom support. 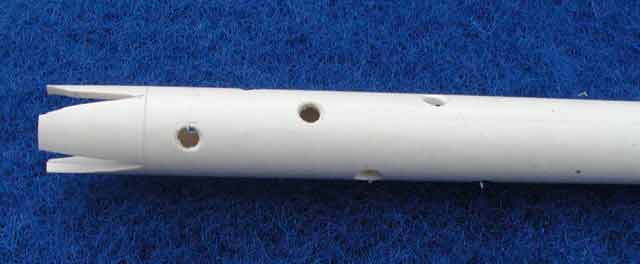 You can click on the pictures for a bigger view. Cut a circle in each grid that will allow the inlet pipe to go down to the bottom of the tank. Glue it all together and you've completed the inlet portion of the project. That should keep you busy for this week. Have fun and good luck pipe gluing.
|
|
The AllAmerican RunnerDuck Review Visit our Blog, www.runnerduckreview.wordpress.com, and sign up to receive notifications when it is updated. Our newsletter is a monthly blog with woodworking projects, crafts, recipes, and more. When you get to our blog just enter your email address and click "Sign Me Up". This is what it looks like:

|