
|
The dual exhaust system could be installed by one person but I really suggest two people to do it right. Of course the first step is to remove the old exhaust system. This is pretty simple, you disconnect the grounding strap from the muffler, unscrew the muffler and tail pipe hangers, loosen the muffler clamp and pull off the muffler.

Place a jack stand under the catalytic converter, loosen the clamp and remove the pipe.

Install the Resonator using the pipe clamp supplied with the kit.

Bolt the "B" pipe to the Resonator with the gasket in place but leave the bolts loose. This photo is wrong because it shows the rear bolt being removed. It's supposed to be the front bolt on both sides but at least it shows you where the tiedown is.

Install the two tail pipe's loosely with the supplied hardware, gaskets and the rubber hangers. The rubber hangers are hard to get on so I used some window cleaner to make them slide on easier.
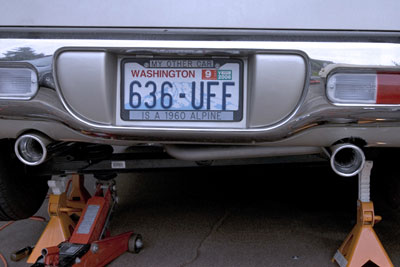 You can get a lot of adjustment out of all the slop in the bolt holes. With a little patience and adjustment I was able to get it to line up perfectly.
 Tighten everything up and you should be good to go. Don't forget to tighten up the ground strap, it's easy to forget.
 I did have to make a couple of phone calls to Mitch at Cruiser Motorsports for tips and that helped a lot. I've included those tips here so you won't need to bother him ;-)
UPDATEWhile I really like the looks of this dual exhaust system it turns out to be a little too loud for me. The noise in the interior was pretty unbearable for me. I decided to replace the resonator with a muffler.
 I went to Muffler King in Kirkland, Washington and they talked me into a Flowmaster Hushpower muffler. They are expensive but I like it a lot better.
 This is the resonator that came with my original kit. The service guy cut out the old resonator with a saws-all.
 Next he welded in the new Flowmaster muffler.

 Here's the Flowmaster muffler installed. The beauty of this muffler is the size. Look at how it just snuggles up into the exhaust tunnel. The muffler has insulation designed into it so it does not heat up the floor pans.
BACK
|
|
The AllAmerican RunnerDuck Review Visit our Blog, www.runnerduckreview.wordpress.com, and sign up to receive notifications when it is updated. Our newsletter is a monthly blog with woodworking projects, crafts, recipes, and more. When you get to our blog just enter your email address and click "Sign Me Up". This is what it looks like:

|
