
For more great plans click on the banner below.
|
|
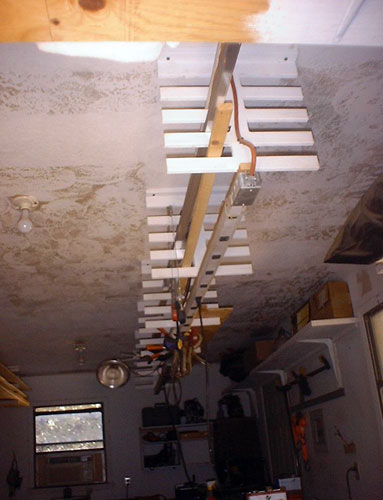
This neat wood storage system was sent to us by Bob B. from Glen Rose, Texas about 60 miles south west of Fort Worth. Wood storage is always difficult to find for woodworkers and this system certainly would help take care of those 2" X 4"s, 2" X 12"s and smaller lumber stock.
You can make these hangers single sided or double sided depending on your storage needs. For a single hanger just lop off the second side from the dimensions.
I've not built the system in my shop yet but Bob and I had a lot of discussion about the reliability of the system. He used 3/4" CDX Plywood because he felt that the glue was better then regular shop grade. Bob has tested his system by hanging on it and writes: "When I tested it by hanging on it, I held one hand each side of center, (this was the double hanger) I figured if "one" could hold me, that meant "two" could hold over six hundred pounds (this was hanging on 32" centers). If you used them on 2' centers for a distance of 8' you could store over 12 hundred lbs, and that means with a 10' ceiling you could make yours hang down twice as far as mine".
Of course your results may vary depending one the materials you choose including glue and screws. If you build this storage system give it a good try before you start hanging things over your head. We take no responsibility for any accidents resulting from this project (disclaimer).
Materials List:
  Single Double Cut out the slots for each shelf using a saber saw to the dimensions below.

Cut the Oak piece 2 1/2" X 15" or 27". After the glue is fully cured you can start loading the rack. Here are some options: Run a power strip along the bottom for easy access to overhead power.
 Add a strip of wood down the center for clamp storage:
 Thanks Bob for the neat idea we hope all our readers will find this storage solution as good as we did. That's about it. We hope you liked this project. If you build it and your friends ask where you got such a clever idea, please tell them that you got it at RunnerDuck.com.
|
|
The AllAmerican RunnerDuck Review Visit our Blog, www.runnerduckreview.wordpress.com, and sign up to receive notifications when it is updated. Our newsletter is a monthly blog with woodworking projects, crafts, recipes, and more. When you get to our blog just enter your email address and click "Sign Me Up". This is what it looks like:

|
