|
This project appeared in our February 6, 2010 Newsletter.
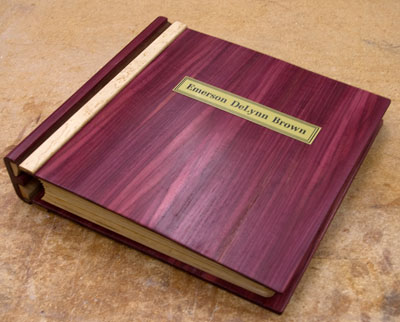
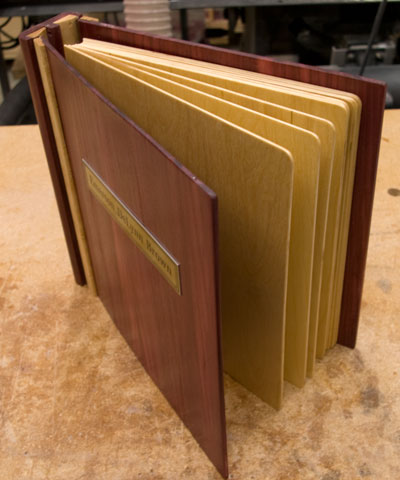
This is the Christmas present I made for our new granddaughter Emerson. She's too young to enjoy it yet but I'm sure her mom will put lots of neat memorabilia into it.
This started as an original concept and turned out to be much more difficult than I ever expected. I was pretty happy with the results and everyone was amazed that the whole book including the pages was made from wood.
The first thing I did was make a small mockup of it to see if my concept would even work and it did.
If you decide to make this project I highly recommend doing the same thing. My dimensions may be off a tad or your tools might make a little different cut so it's well worth the effort.
I made the final book from the following:
- Covers - Purple Heart
- Binding - Purple Heart
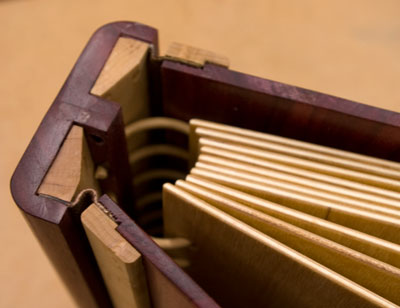
- Hinge Clamps - Birds Eye Maple
- Hinges - Leather
- Spiral - Round Reed
- Pages - Birch Plywood
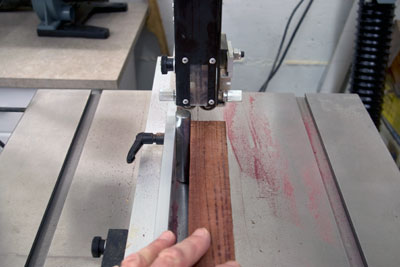
I started with the covers by cutting down some 4" X 4" Purple Heart 12" long and then sliced it to 3/8" thick on the band saw.
I flattened one side of each piece with my jointer which didn't work great because Purple Heart does not like power cutters.
I then tried to run them through my planer to flatten the other side and get them close to 1/4" thick again with not a lot of success. Purple Heart just tears out way too easy.
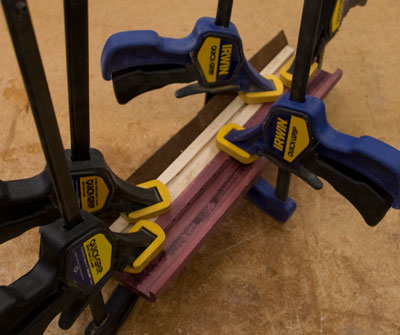
I squared the edges on the jointer and edge glued them so they were approximately 12" X 12".
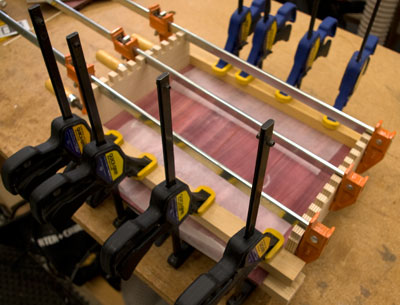
I used cauls across the boards to keep them flat. I also used wax paper under the cauls to keep the glue from sticking to them.
Using a belt sander I carefully sanded them to remove some of the chip outs from planning and jointing. It takes some real control to keep them flat during this step. Keep the belt sander moving evenly back and forth at a slight angle to the grain.
Once I had them the way I wanted I moved on to the binding or back of the book.
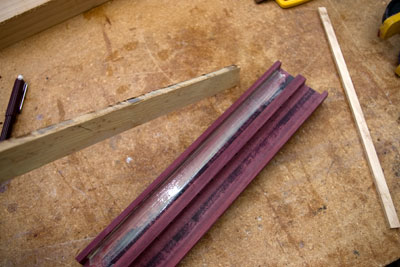
Once again I cut down some Purple heart 12" long from my 4" X 4".
On the band saw I cut it to a little over 3/4" thick and on the tablesaw to 2 1/4" wide plus the width of my table saw blade.
Once again it was off to the jointer and planer and more frustration.
I set up my 3/8" dado blade to 1/2" deep and cut a dado starting 1/4" in from the side along the length each piece.

Freud Box Joint Cutter Set
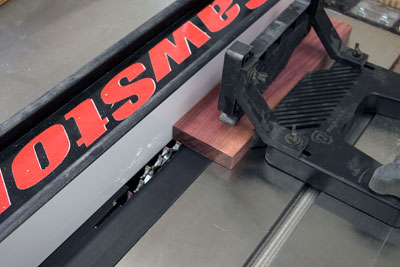
I would make one pass, rotate the piece and make another pass. Then adjust the fence so the blade would just overlap the last pass and do it again. I continued doing this until I had a dado 3/4" wide on both sides of the piece.
Using a 3/4" roundover bit in the router radius the two back edges of the binder. Do not make a full cut but sneak up on it. A neat trick I learned on one of the woodworker magazines was to place a piece of tape along where the bearing will travel just prior to the final pass.

Roundover/ Beading Router Bits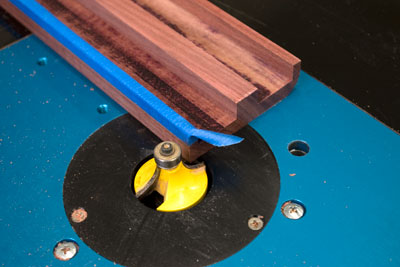
After you make the pass against the tape remove it and make your last pass, it should greatly reduce the burning especially in woods like Purple Heart.
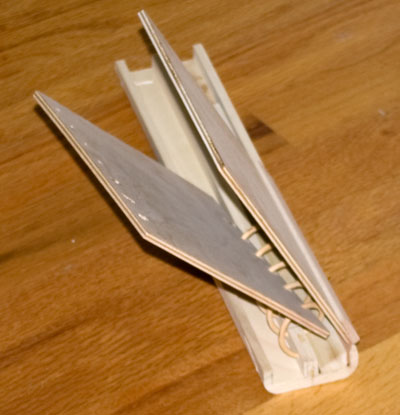
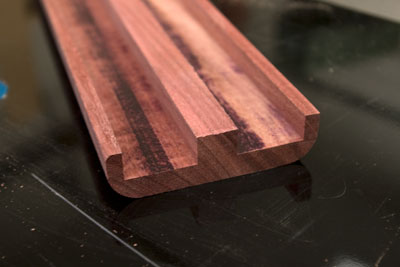
You should now have something that looks like this.
Next I cut it in half down the middle.

Drilling the holes for the spiral requires a great deal of accuracy. You will need to drill a set of holes in each half that will align perfectly once the two halves are glued back together.
Accurately mark the hole locations starting 1/2" down from the top. Put the two pieces together and use a square to mark both pieces at once.

Space the holes 3/4" apart.
Set up a fence on your drill press so the holes will be 1/4" in from the inside edge. Drill a 5/32" hole at every mark all the way to the bottom.
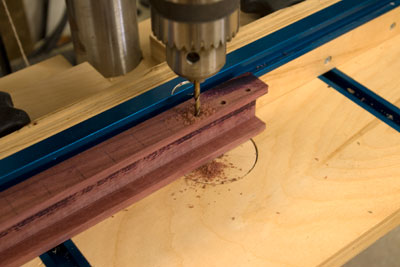
Do the same for the other side.
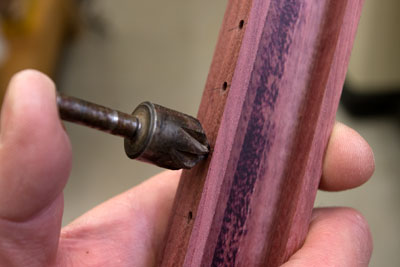
Using a countersink debur the outside of each hole.
To glue the two halves together insert a 5/32" dowel into a couple of holes, one at the top and one at the bottom, to align everything and edge glue the two halves together and clamp.
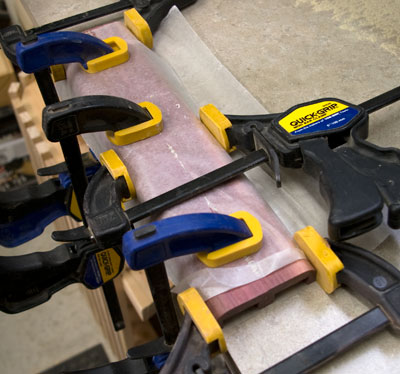
Again I used cauls with waxed paper to keep them from sticking.
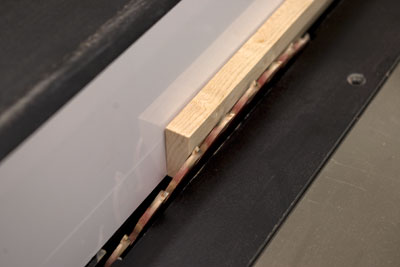
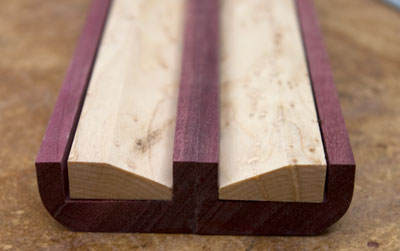
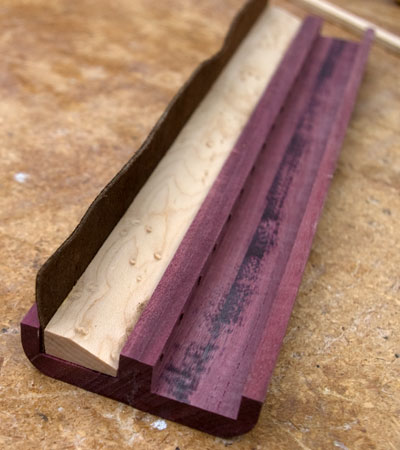
To hold the leather in place on the cover and binding I made pieces of birds eye maple. I cut the two pieces for the covers 12" X 7/8" X 3/16".
I cut a small dado along one edge 7/32" wide by 1/16" deep
Round over the two edges using a 1/8" roundover bit in your router.
The inserts for the binder to hold the leather are a little tricky. You'll want a piece of Birds Eye Maple 29/32" X 12" X 3/8".
Set your tablesaw blade to 24 1/2 degrees and your fence so that you'll the bottom 1/8" wide.
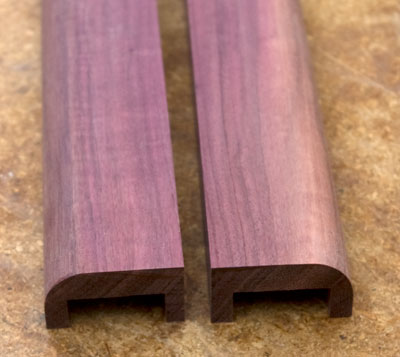
You should now have your binder looking like this.
For the spiral wrap approximately seven feet of water soaked 1/8" round reed around a 1 1/2" dowel. Do not over soak the reed or it will crack. Do not under soak or it won't bend well. I believe I soaked mine for about a hour.
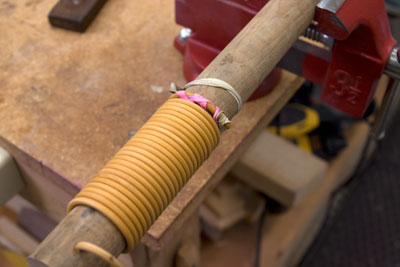
I drilled a 1/8" hole in the dowel and inserted one end of the read into it. I wrapped it very tight and tied the other end to the dowel using rubber bands. Let it dry overnight.
Now it's time to get everything sized correctly. Cut the covers down to 11 1/4" X 12".
Trim the binding to 12" as well as the Maple pieces if required.
Cut a dado along the back outside edge of both covers 3/8" wide and about 3/32" deep to capture the leather hige. This will give you some clamping force against the leather.
Cut two pieces of leather 1 1/8" wide and 12" long. These will be the hinges so use a soft flexible leather like suede.

I used leather elbow patches but had to use to two pieces for each side because they are too short.
I decided it would be easier to put the finish on the covers before they were glued to the hinges so I masked off the dado where the leather will go and applied rub-on polyurethane.
While I was at it I finished the binder at the same time.
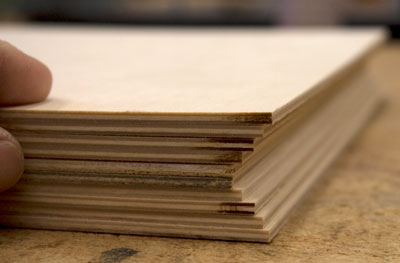
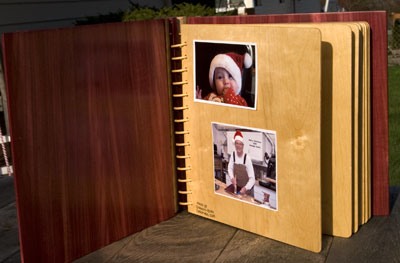
The pages are cut from 3mm birch plywood. I made ten pages with the first and last pages 10 3/4" X 11 1/2".
You need to mark each page so the sequence stays the same for the rest of the project, this is very important.
Because the pages will ride on the radius of the spiral reed you'll need to decrease the width by 3/32" starting with page 2 and increase it starting with page 7 keeping pages 5 and 6 the same.
I made a little jig to round the corners of each page using my router and a straight bit with a follower bearing.

Pattern Flush Trim Router Bit

Round the two outside corners of each page.

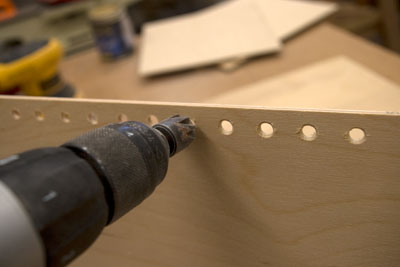
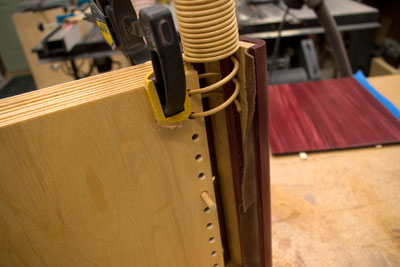
While keeping the pages in sequence drill 1/4" holes 3/4" apart along the back edge.
Because the spiral reed slopes down the holes in the pages will need to match that slope. I marked the first page starting 1" down every 3/4". I laid that page on top of the next 3/64" up from the top and transferred the marks.
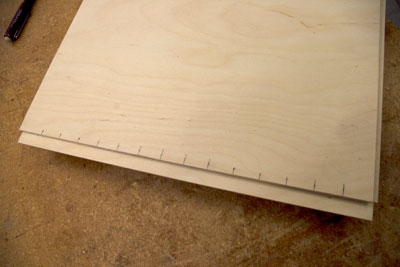
Set your drill press fence so the drill bit is 3/8" from the back. Drill holes in the first page starting 1" down from the top and 3/8" in from the back.
Repeat this but move the starting hole up 3/64" for every page. Be sure to keep the pages in order.
After all the holes are drilled take a countersink bit and lightly hit each hole on both sides to help the pages turn smoother when you are done.
Sand and finish the pages with polyurethane.
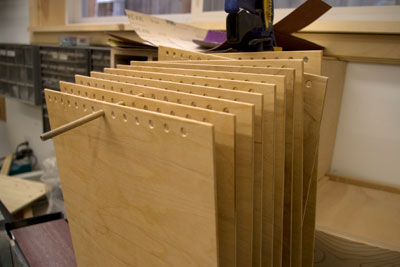
I used a dowel to place the pages on while they dried.
Putting in the pages and attaching the covers can be done in any sequence you want. I put the leather hinge on the binding first, then the pages and lastly the the covers. I'm not sure which way would be easiest.
Practice assembling the binding without glue to make sure everything fits and works as planned.
Apply glue to one side of the binding and to one of the tapered Maple pieces along with the leather. Be careful no to get too much glue along the leather.
Clamp the leather in place with the Maple piece.
Using the scrap tapered piece from when I made the Maple inserts I clamped everything so that pressure was applied all along the leather.
For the spiral remove the reed from the dowel and cut the end of the reed smooth. I sprayed a light coat of clear acrylic paint on the reed just to help keep it together and to help with wear. Start lacing it through all the pages and the binding moving a little at a time.
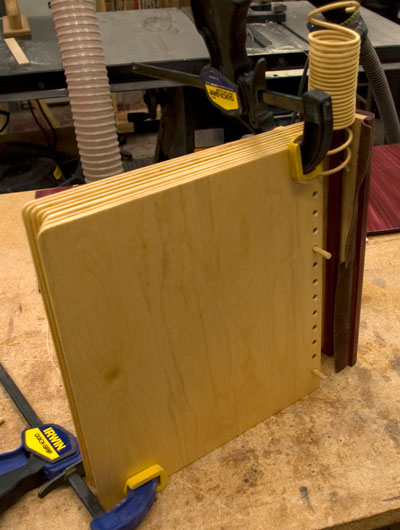
I placed a couple of dowels through the holes just to make threading the reed through the pages a little easier.
This is a very slow process and my index finger and thumb are still hurting.
Once the binding has been threaded the full length even it out and glue the two ends into the binding.

I used five minute epoxy and worked it into the holes really good. In hindsight it might be a good idea to glue the reed into every hole. It has a tendency to creep up or down a little bit increasing the diameter on one end of the other.
To glue the hinges on to the covers applied glue to the cover and Maple strip and clamp the leather in between. This is kind of tricky so practice first before doing the real deal.
Use a good stiff caul like 3/4" oak on both sides to clamp the two together.
I did some last minute touchup on the finish and there you have it a wooden scrapbook!
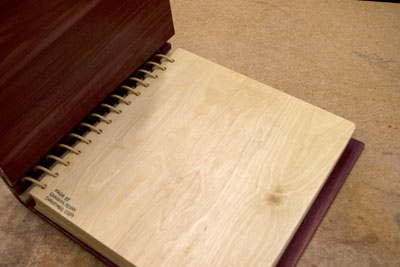
And the icing on the cake!

That's about it. We hope you liked this project. If you build it and your friends ask where you got such a clever idea, please tell them that you got it at RunnerDuck.com.
| 


