|
The Gun;
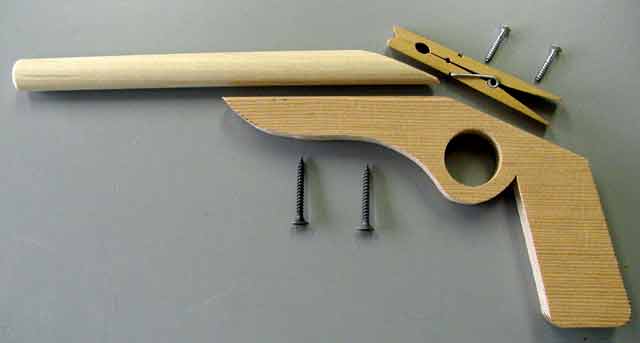
Draw the gun pattern you can find at www.runnerduck.com/images/toy_gun_handle.gif onto a piece of 1/2" to 3/4" wood.
Using a scroll saw, band saw or jigsaw cut out the pattern.
Sand all the edges smooth.
Drill a 1" hole for the trigger.
Cut a 5/8" piece of dowel 8" long. I tapered one end to match the handle.
Cut a small notch in the front of the dowel for the rubber band to rest in.
Drill two holes in the handle, glue and screw the dowel onto the handle.
Drill two holes in the clothespin, blue and screw it to the handle.
The Target;
Cut a 1/2 piece of plywood 4" X 10".
Drill a 5/8" hole in the center of each end.
Cut two 5/8" pieces of dowel 6" long.
Drill a small hole big enough for a clothes hanger wire 1/2" down from the top in each dowel.
Glue the dowels into the plywood.
Run a wire through the holes with small clothespins and beads for spacing.
Bend the wire on both ends to hold in place.
Cut your targets out of paper. We have some already for you at www.runnerduck.com/images/target.gif.

Get some rubber bands, set it up and start shooting.
As always observe all safety precautions and don't shoot at anything but the targets. Parental supervision is always recommended.
|


