

For more great plans click on the banner below.
|
|
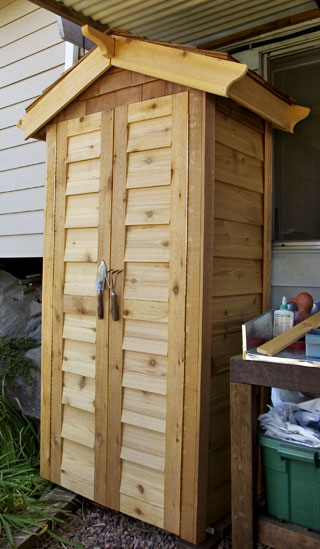 This project was inspired by Marilyn who wanted a small storage shed near her potting table. We looked at a number of different plans but none quite suited her so I came up with my own design. It's pretty simple to build and should only take a couple of weekends. Here's what you'll need:
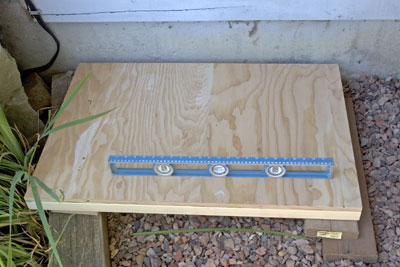
The Floor: I started with the floor, then the roof, sides, back and lastly the doors. The floor is a simple 2" X 4" frame with a 36" X 24" piece of exterior 3/4" plywood on top.
 Bottom View The Roof
I built the roof as a stand alone piece but you could build it in place. I was working in a limited area and did not have much head room above the shed.
 Assembly the roof less the Rafters.


To get the angle for the Rafters, align the them between the Ridge Beam and the edge of the Top Plate. Used a piece of 2" X 4" between the Top Plates to support the Rafters when you are screwing them to the Ridge Board. The Sides The sides are very simple. Cut the pieces per the cut list and nail them together. Place the Cross Block vertical against the outside edges of the sides.
 Make sure the floor is level.
Screw or nail the sides to the floor. You may want to run a cripple to hold them in place.
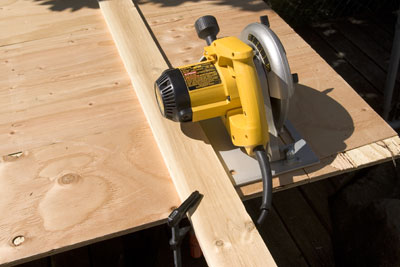
 Use a piece of straight lumber clamped to the plywood as a cutting guide. Cut the plywood using a circular saw.
 Place the roof assembly on top of the sides and nail it into the top plates. Add the side top plates and then nail the rafters to the top plates.
 Nail the back onto the frame and roof. You now have the basic structure of your shed. The Siding The siding is pretty straight forward. Cut the siding to fit the sides and nail away. You may want to put tar paper in the sides first but I chose not to.

Cut the corner pieces and nail them to the corners. It's a little hard to see in this picture but the side boards extend forward and the front and back corner boards but up to them. The hinges for the doors will attach to the front corner boards so glue them to the 2" X 4" before you nail them in place.
 The Roofing
Now we'll finish the roof. Cut the Roof Sheathing. Evenly space them between the peak of the roof to within 1" of the end of the rafters and flush to the back of the shed. 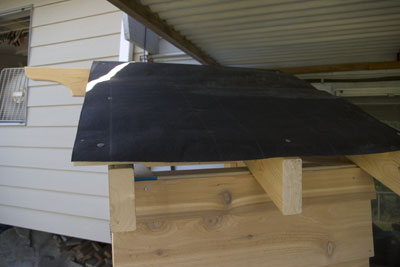
Add the Cedar Shakes starting with two courses along the bottom edge. Allow about 1" to 1 1/2" overhang on the sides. front and back.
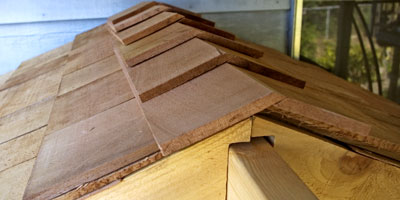 Cut Cedar Shakes to fit the front of the roof. This will take some fiddling around to get them to fit.

 Cut the Front Fascia boards to fit around the Ridge Board. I cut some scalloped ends onto my fascia boards.
 I matched the end pattern on the back Fascia Borads. These boards do not run all the way up the back, only to the edge of the shed. Our shed is going up against the house so we really didn't care about the back.
 Now cut the side Fascia Boards to fit between the front and back.
 The Door
Cut the frame pieces for the doors.
 I also used the stop on my table saw miter to make it go a little faster and insure accuracy.
 I also used the stop on my table saw miter to make it go a little faster and insure accuracy.
Glue and clamp the door frames together.
 Apply the glue, square the frames by measuring from corner to corner, they should be exactly the same dimension.
 Clamp the frames and let them dry.

Next we will glue and screw the plywood backs on the doors. Cut the plywood and lay it out on the backside of the doors.
 The plywood needs to be off center to clear the 2" X 4" stud on the front of the shed. It also needs to be mounted so that it clears the top and bottom of the opening. Determine these measurements before gluing and screwing.

After that is dry cut, clue and nail cedar siding into the front of the doors.
 Clamp the siding down to hold it in place while it dries.
 Add the hinges to the outside edges of the doors.
 Next screw the hinges to the front corner pieces.
 Add door handles and a latch. We used some old garden tools for the door handles.

I made my own latch from some left over cedar. 
Cut out the pieces, two front pieces, four back pieces and the slide.

Check that the slide will move smoothly when the blocks are screwed in place by placing it on a flat surface and trying it. You may have to sand down the latch a little bit.
 If everything went according to plan your door latch should look something like this.
 You should not have a pretty darn nice looking shed. Install shelves to suit your needs and start filling it up. That's about it. We hope you liked this project. If you build it and your friends ask where you got such a clever idea, please tell them that you got it at RunnerDuck.com.
|


|
The AllAmerican RunnerDuck Review Visit our Blog, www.runnerduckreview.wordpress.com, and sign up to receive notifications when it is updated. Our newsletter is a monthly blog with woodworking projects, crafts, recipes, and more. When you get to our blog just enter your email address and click "Sign Me Up". This is what it looks like:

|