
For more great plans click on the banner below.
|
|
 I made a really nice potting table a few years ago and it's worked great but because I gapped the top boards dirt would fall through onto the containers stored below. To prevent this from happening I decided to build a portable potting table to help contain the dirt. I figured that covering it with sheetmetal would make it easier to clean and prevent water from soaking into the wood. I'm not use to working with sheetmetal and found it to be a fun challange. A good sharp pair of shears really helps and exact measurements insures that the metal will fit correctly. Unfortunately my measurements were not that exact so I ended up with some sloppy areas in the sheetmetal. While it doesn't show in my pictures you should wear gloves when working with the sheetmetal because it can cut you very easily! It still turned out OK and Marilyn likes it a lot. I guess that's the most important thing :-) You can make you portable potting table any size you like, mine ended up being 20" X 36". These directions will apply to any size you decide to make. Here's what you'll need.
Place the base on your sheetmetal centered side to side and 1 1/4" up from the bottom edge.
 Trace around the wood with a sharp scribe. Cut straight in from the sides even with the far edge of the bottom. Allow for the thickness of the sheetmetal and fold up the sides and back using the plywood as a straight edge. Use a hammer and block of wood to get a nice sharp edge.
 Set the sheetmetal aside and finish the box. Cut the back 6 3/4" high and the full width of the bottom plus the two sides. That turned out to be 35 7/8" on my table. Cut the sides 6 3/4" high and the same depth as the bottom. Along the top edge mark 4" in from the back and in the front 4 3/4" up from the bottom. Draw a line between these two points. Cut the taper using the taper jig that we build in our newsletter back in April of 2004, www.runnerduck.com/04-09-04.htm
 A neat little trick for aligning the taper jig it to match the line on your piece with the miter "T" channel in the table saw. Glue and nail the sides and back to the bottom. For extra strength I used a good waterproof glue and clamped the pieces together until dry. Cut two small pieces of 1" X 3/4" X 4" for handles. Drill through the sides, counter sink the holes, glue and screw the handles onto the sides. To make the table easier to carry I balanced it on a piece of dowel to find the center of gravity and used that for the center of the handles.
 Cut away all but about 1" of the corner pieces. I tapered each end to make it fit better.
 Place the formed piece of sheetmetal into the box. If you measured and bent it correctly it should fit snuggly and squarely into the box. Using a scrap piece of 3/4" stock, mark a cut line on the sides and back.
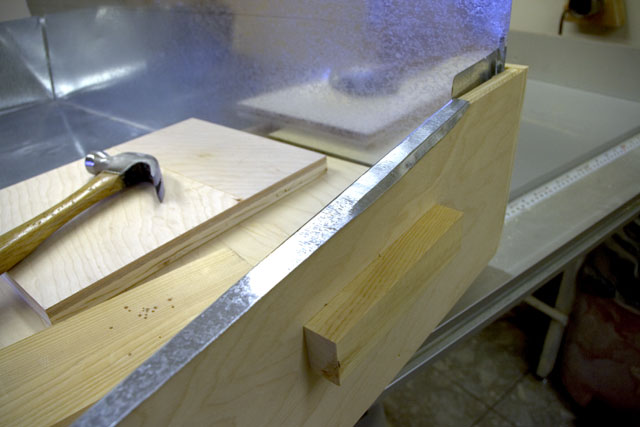
 Hold a block of wood against the edge of the box and hammer the sheetmetal over all the edges.

 Hammer the edges flat along the sides, back and bottom. Place large head nails along the edges to hold the sheetmetal down. Check for any sharp edges or points and knock them down. For added protection from water you can paint on a coat or two of end cut sealer used on ground contact timbers. That's about it. We hope you liked this project. If you build it and your friends ask where you got such a clever idea, please tell them that you got it at RunnerDuck.com.
|
|
The AllAmerican RunnerDuck Review Visit our Blog, www.runnerduckreview.wordpress.com, and sign up to receive notifications when it is updated. Our newsletter is a monthly blog with woodworking projects, crafts, recipes, and more. When you get to our blog just enter your email address and click "Sign Me Up". This is what it looks like:

|