

|
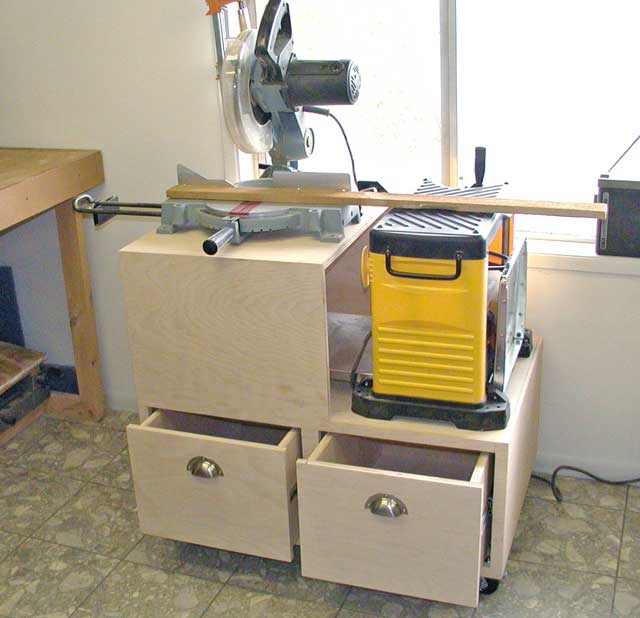
This project was inspired from an article I saw in one of my woodworking books. Unfortunately I couldn't find the book again so I made my own plans. If you have a small shop like mine then every square inch of space needs to be optimized. This miter saw/planner stand helps serve that purpose. It will get my planer off of the bench and not take up much more area than my miter saw currently uses. It also gives me a couple of really nice drawers to store things.
 Here's a list of materials you'll need to buy.
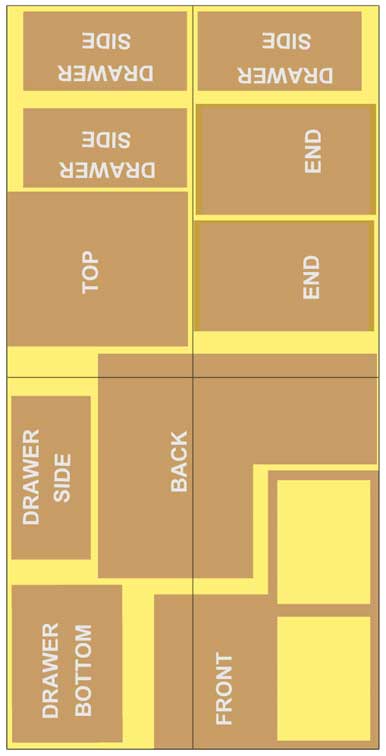
(2) 4' X 8' X ¾" shop grade plywood. I started off pricing Baltic Birch plywood and this little project would have been over $400. I opted for the birch shop grade which will do just fine. The following patterns are laid out on 4' X 8' X 3/4" pieces of plywood. These patterns are a little hard to see in these pictures but if you click on the pictures you'll go to a bigger image on our web site. If you want to print them out it's best to set your printer to "landscape".
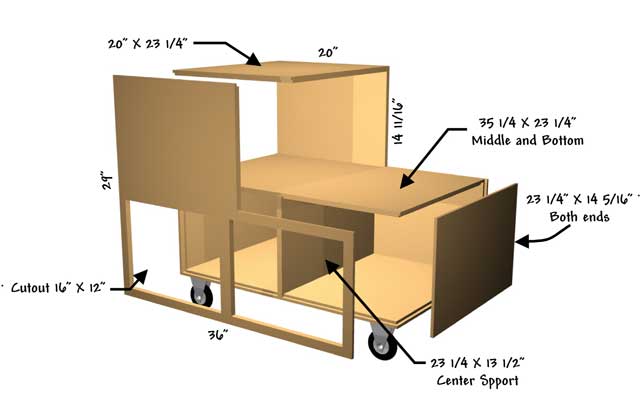
 The dimensions for this project should be adjusted for your particular application. I've given you the dimensions for my stand but yours may vary based on the sizes of your miter saw and planner. The most important dimensions is the distance from the planner base to the table of the miter saw. Part of the idea of this stand is to have the planner work as a support for wood that you cut on the miter saw. After you've carefully figured out your dimensions start cutting out the stand. Don't cut out the drawers until later. The joinery you use is up to you. If I remember right the stand I sad in the book used but joints, glue and screws. I used rabbet joints for the entire project and glue. Here is a dimensional exploded view of my stand.
 You'll notice that I cut out the openings for the drawers as opposed to making them with separate pieces of wood and tenon joints. This worked pretty good but you really have to be steady with the scroll saw! A router with a plunge bit and a guide fence would have made them straighter. After I got all the pieces cut I started the glue up. What worked best for me was to glue the middle into the sides first then the top after the middle had dried. Part of my problem is I don't have enough large clamps to clamp up something this big.
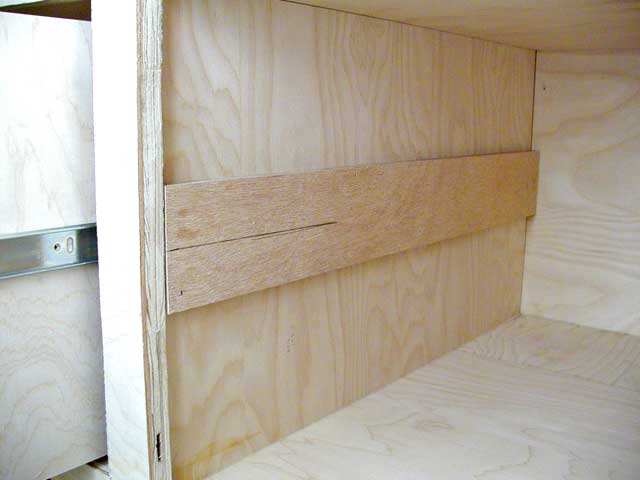
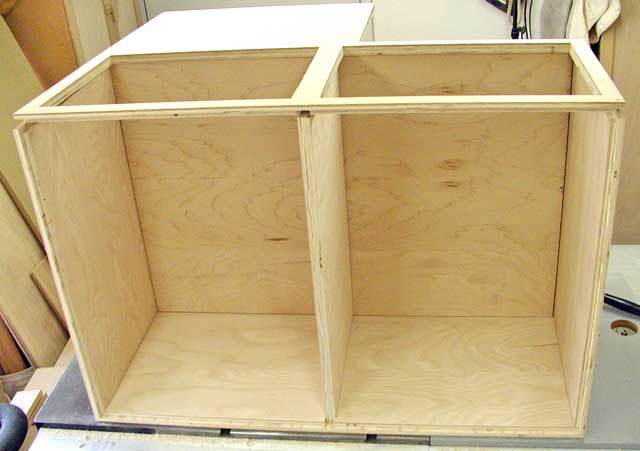 I glued up the bottom, ends and center support in the final assembly step. I cut two pieces of 3/8" plywood to attach my drawer slides to. I glued and nailed them in the centers of the ends and both sides of the center support.
 I attached the wheels in the four corners of the bottom. I used Ny-lock nuts and washers on the inside. Finally I built and installed the drawers. Again I used rabbet joints for the sides and bottom. Because I wanted the drawers to fit flush to the outside of the stand I added a front to the front piece of the box. Here are the dimensions that worked for me. Again I encourage you to measure and make them fit your stand.
 Glue and clamp the box together. After it has dried you're ready to install the drawers. Don't put the front piece on yet. That will be the last step we do except for the handle and finish. Using a square, draw a straight line in the middle of the drawer opening on the drawer hardware spacer from the front to the back. Do this on all four spacers. Attach the drawer slides to the sides of the drawer openings.
 Mark a straight line on the sides of the drawers where the slides will go. Make the drawers so the bottom of the drawer slides about 1/4" above the opening. Install the drawer on the slides and push it in. To align the drawer fronts I inset the bottom of the front and tilted it out marking the sides of the drawer. I repeated that for the sides. I removed the drawer from the stand and placing the front face down place the drawer aligned to the marks. Drill and counter sink four holes for #8 screws. Screw the fronts onto the drawers. Mount the handles on the drawers and reinstall the complete drawers. Except for some finishing your miter saw/planner stand is done. I placed my miter saw on top and my planner on the middle self and they align perfectly. This has saved me some valuable shop space and given me some more storage. The drawers are very well built and the slides are heavy duty so I can put a lot of heavy items in these drawers if I need to. We hope you've enjoyed this project and have good success with it. Remember, if you ever have any problems with our projects just drop us a line and we'll try to help. Since we build every one of these projects we have a pretty good idea of how to get through them. We also make lots of mistakes so we can help avoid them. |
|
The AllAmerican RunnerDuck Review Visit our Blog, www.runnerduckreview.wordpress.com, and sign up to receive notifications when it is updated. Our newsletter is a monthly blog with woodworking projects, crafts, recipes, and more. When you get to our blog just enter your email address and click "Sign Me Up". This is what it looks like:

|