

|
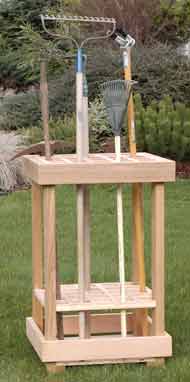 If your garden tools are anything like ours then you will spend some time digging them out from behind other tools. We've designed this organizer to hold your long handled tools to make them easy to find.
Here's what you'll need:
 We're going to take a couple of weeks to build this project. Not because it's so difficult but because I'm running way behind and don't have it done yet :-)
Cut four 2" X 4" pieces 24" long and miter 45 degrees on each end. We are going to make two identical grids and then cut one to fit near the bottom of our organizer.
Cut the 1" X 4" boards into 1" X 1" strips. 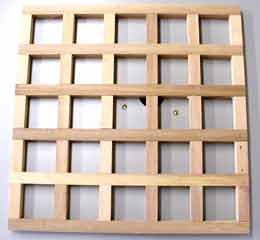 If you are lucky enough to have a Delta Unifence or a Biesemeyer fence you can set it up in combination with your miter to set your dimensions as shown here.  Otherwise mark out your dimensions on the wood and saw away. Dado one end then the other of each piece. Set up your saw for the next cut and do it again. Set up your saw one more time and finish the dados. Glue the pieces together. I used Gorilla Glue and it seemed to work great. Repeat these steps for the bottom grid. Cut a notch in each corner of the bottom grid to fit between the legs. Position the bottom grid about 5" up from the top of the bottom 2" X 4". You may have to persuade it a little bit to get it in place. Pre-drill and install a screw through each leg into the grid. Put the top grill in place and screw it from the bottom into the sides, this will hide the screws. I just put four screws in, one in the center of each side. That's it! Now get out there and clean up that messy shed. Everyone will wonder where you got such a cleaver idea. Be sure and tell them that it came from RunnerDuck :-) We hope you've enjoyed this project and have good success with it. Remember, if you ever have any problems with our projects just drop us a line and we'll try to help. Since we build every one of these projects we have a pretty good idea of how to get through them. We also make lots of mistakes so we can help you avoid them. For a great selection of woodworking supplies and tools check out Rockler, Great Prices/Great Selection! |
|
The AllAmerican RunnerDuck Review Visit our Blog, www.runnerduckreview.wordpress.com, and sign up to receive notifications when it is updated. Our newsletter is a monthly blog with woodworking projects, crafts, recipes, and more. When you get to our blog just enter your email address and click "Sign Me Up". This is what it looks like:

|