

For more great plans click on the banner below.
|
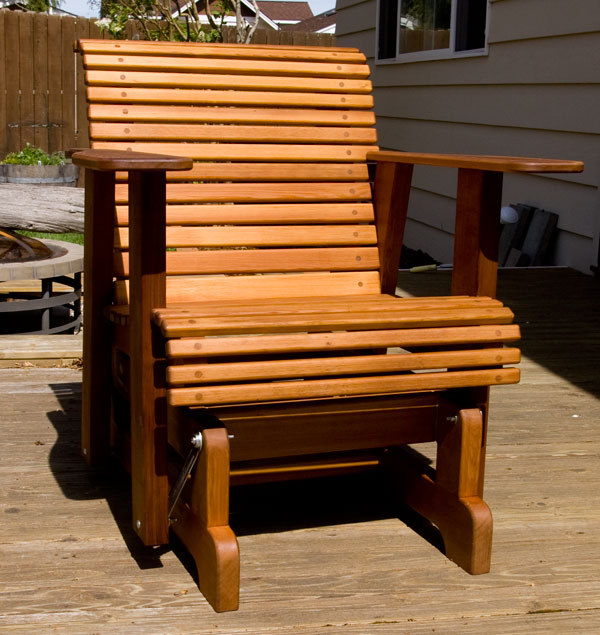
I have looked at many different deck chairs and glider chairs and always wanted to build a couple. I finally bit the bullet and designed one that I really like. Making them out of clear cedar was very nice but quite expensive in today's wood market. To begin with I cut, drilled, rounded all the edges and sanded all the pieces before I put it together. Making two chairs at once took up quite a bit of space but in the long run it made it easier. First I made the base. I cut the bottom pieces from 2" X 6" and all the others from 2" X 4". Here are the dimensions: 
Click on the picture for a bigger image. Once all the base pieces were cut to length I took a little bit off of the edges to square them up. 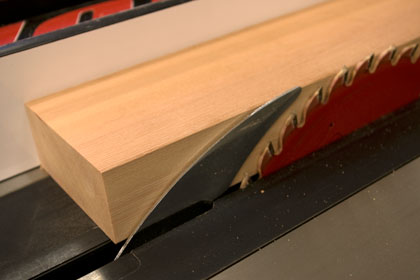
I used a French curve to layout the bottom of the bases. 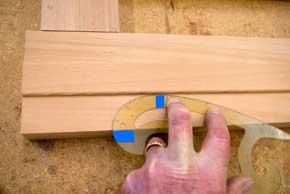
I use a little masking tape to mark my start and stop points so that each end will be the same. 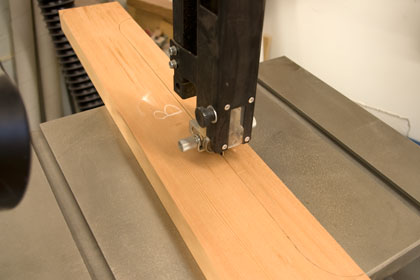
I used a can to layout the radius for the two upper pieces. 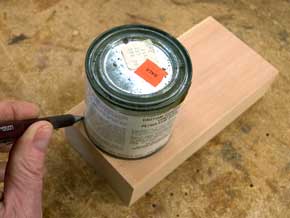
Next I made my tenons cutting 1" in from each end and 3/8" deep. 
Set up a stop on your miter fence to make each cut accurately. 
Heavy-Duty Tenoning Jig 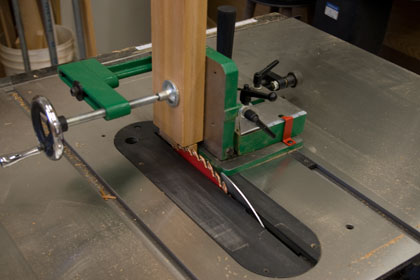
Cut the cross members with tenons on the ends as shown below. 
Cut the mortises 3/4" wide and 1" deep. 
I used my big mill-drill with a 3/4" end mill which worked great. 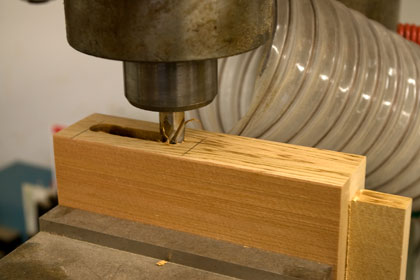
There area many other ways to make a mortise but I like the accuracy of my big old mill. 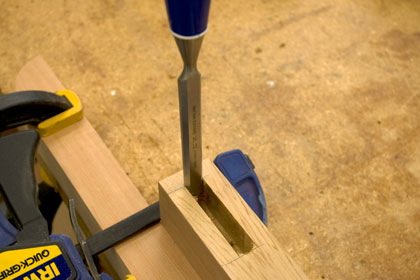
Glue and clamp the top pieces together first. 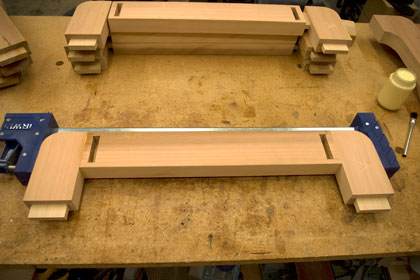
I like using big old furniture clamps for this to help keep things square and provide good clamping pressure. 
Bessey Revo K-Body Clamps Drill 1/4" holes for the hangers using a drill press so they are 90 degrees through the piece. 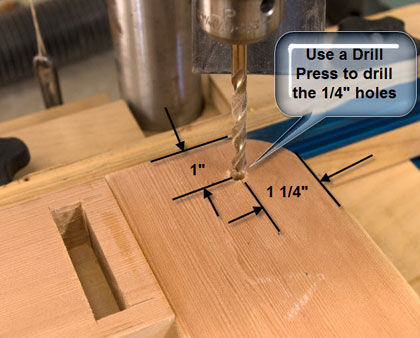
Center the upper pieces to the bottom piece and mark the locations for the mortise holes. 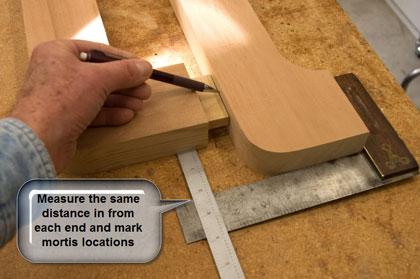
Cut the mortises as before. 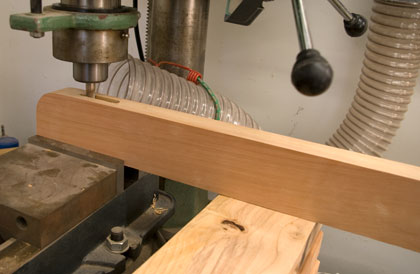
Glue and clamp the top piece to the base. 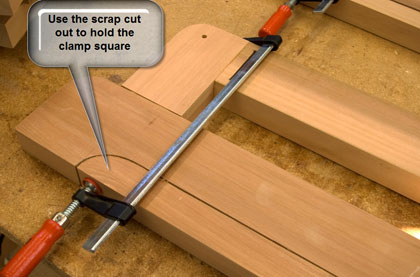
Use the scrap piece that was cut out from the base to support the clamp. 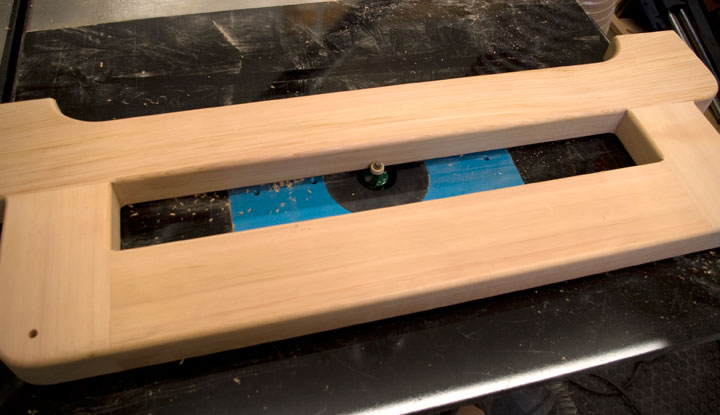
I used a dowel with sandpaper to roundover the corners. 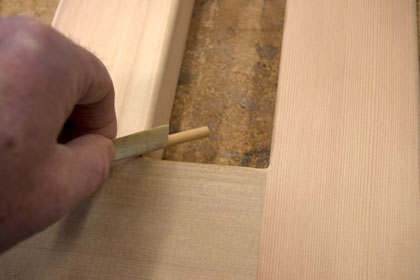
Now it's time to glue up the base assembly. Lay out all the pieces and clamps so everything is ready to go. 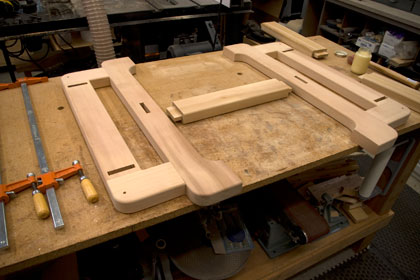
Glue and clamp the two sides to the cross members. 
Use a good waterproof glue like Titebond III. 
Titebond™ III Ultimate Wood Glue Now it's time to start on the seat and back. I took the seat base from my prototype and traced it onto a 2" X 6". 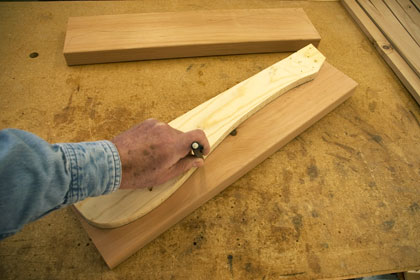
To make the original one I used a French curve to get the shape. After that I made modifications to it until it felt comfortable. It involved a lot of putting together and taking apart. 
Click on the picture for a bigger view. I used my handy dandy Wixey digital protractor to draw all the angels. 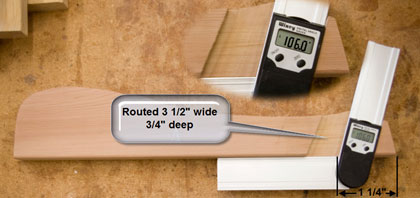
I also use it to set up the angles on my miter saw. 
I made a simple jig to guide my palm router for cutting the seat back notch. 
Click on the picture for a bigger image. Make shallow cut passes until you get to 3/4" deep. Repeat for the other piece.
Click on the picture for a bigger image. Draw a radius on the top of each chair. Again I used a paint can for the radius. 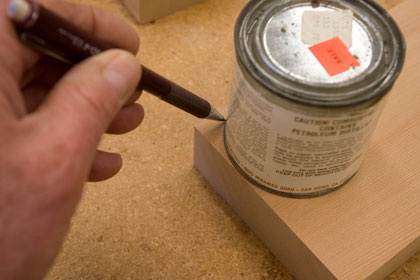
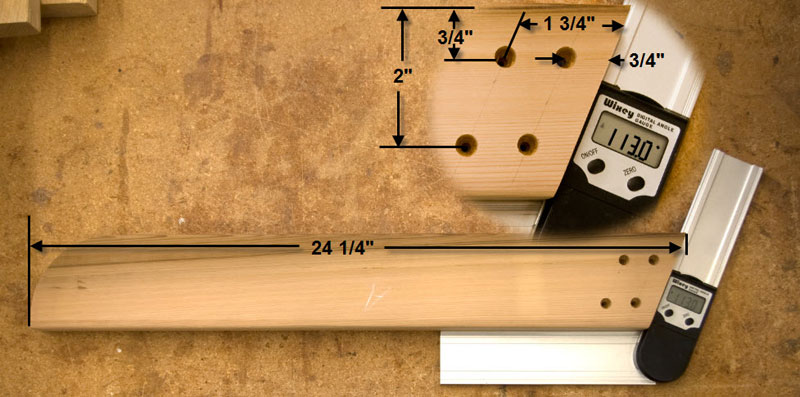
Be sure you cut the radius on the front side of the piece, that would be on the longer edge. Now cut the back leg as shown. 
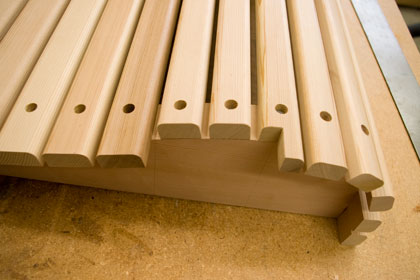
Click on the picture for a bigger image. The front leg is cut square at 23" long. Drill a 1/4" hole 3/4" up from the bottom and in the center of each leg. These will be the mounting holes for the hangers. Next comes the real fun, cutting all the slats. Using 1" cedar, actual size 3/4", I cut 14 pieces for the bottom and 15 for the back. Each piece progressively gets larger as it goes to the back or bottom. 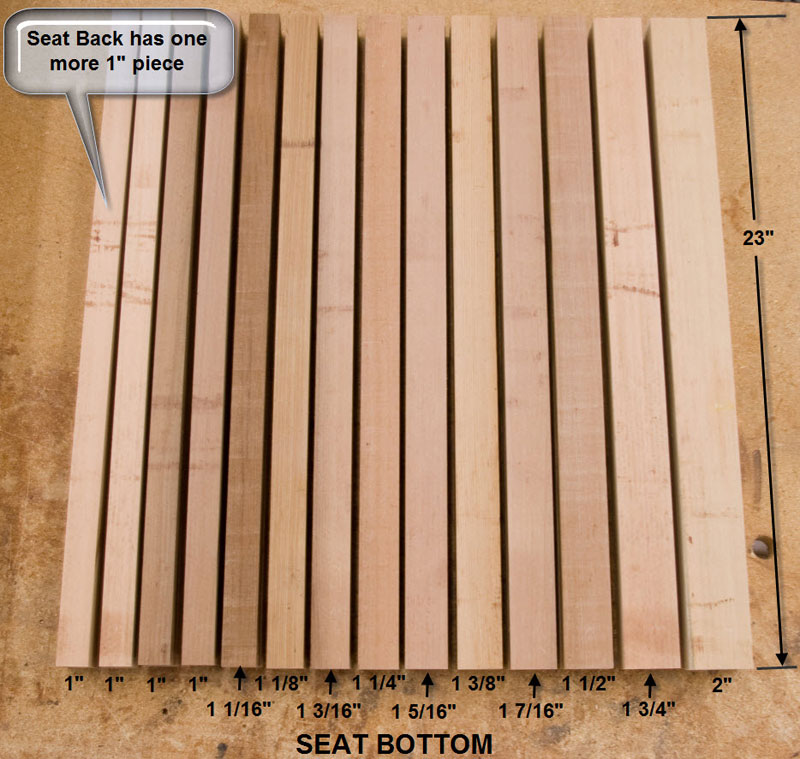
Click on the picture for a bigger image. Notice that the back has one more 1" piece. 
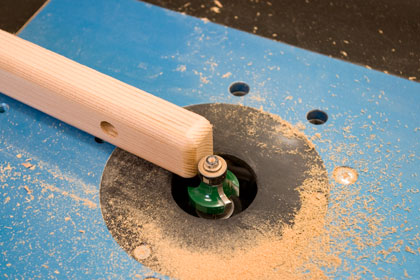
You may have noticed in the picture above that I am routing in the wrong direction. It is called an "up cut" and I use that to prevent chip-out on splintery woods like cedar. Set the fence so that you are removing only about 1/3 of the full cut. Then move the fence in another third and make a second pass. Move the fence in again to where the wood just misses the bearing on the router bit. Then make a final pass in the correct direction with the piece against the bearing. Be careful doing this and hang onto the wood because the router bit is going with the wood it has a tendance to pull the wood out of your hand. Set up a fence with a stop on the drill press. I marked the center of every piece on one end and used that mark to adjust the width of my fence. 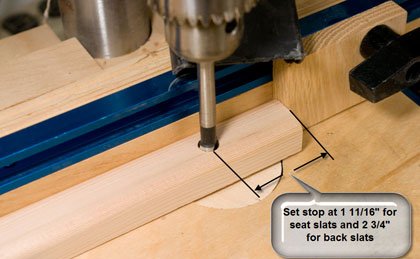
The seat holes are 1 11/16" in from the end and the seat backs are 2 3/4" in. 
22-Piece Forstner Bit Set Once all the pieces are counterbored drill a countersink hole using a countersink bit with a drill for a #8 screw. 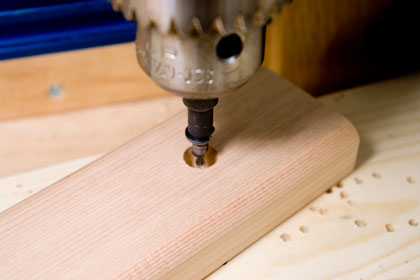
Now it's time to start putting things together. Assemble the sides of the seat together using glue and #8 - 1 5/8" deck screws. 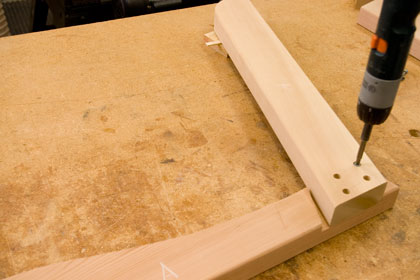
Space the sides 18" apart. 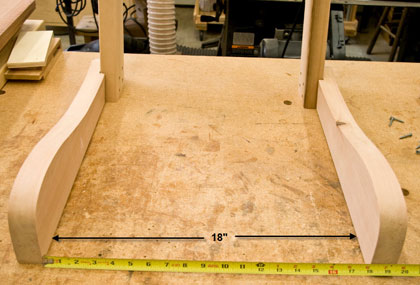
Be sure to measure the front and back. I also used a square to make sure that the ends aree square to the sides. 
Use a 1/8" spacer between the back and seat slats. Screw them in using #8 - 1 5/8" deck screws. 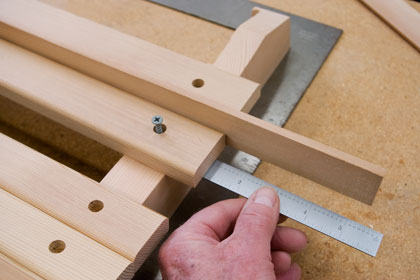
I measured in from the end of each board to make sure it is centered and then screwed it in. Now I measured and marked where my legs were going to go and cut those slats to match. 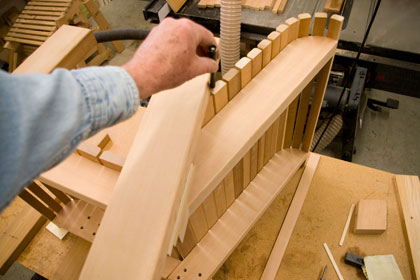
Assemble the legs to the seat. 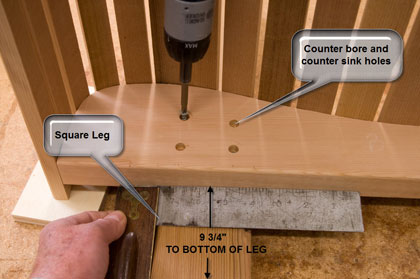
The front leg should sit 9 3/4" from the bottom of the seat to the bottom of the leg. Be sure to square the leg before you glue and screw it with #8 - 1 5/8" deck screws. Drill, counterbore and countersink four mounting holes the same way you did the slats. To install the back legs remove three screws, the two back ones and the upper inside one. 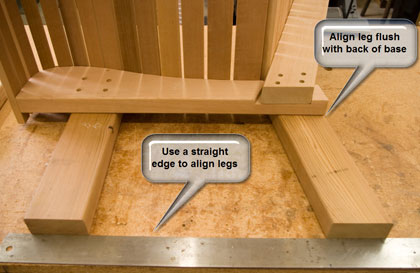
Use a square to align the bottoms of the legs. Glue and screw the back legs on using #8 - 3" deck screws. 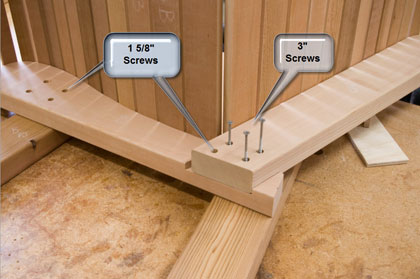
Cut out the arm rests from 1" X 6" cedar. 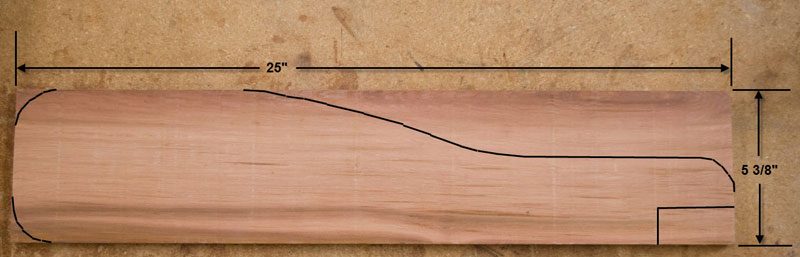
Click on the picture for a bigger image. Roundover both sides of the arm rests and sand. Do not roundover the notch at the back of the arm rest. 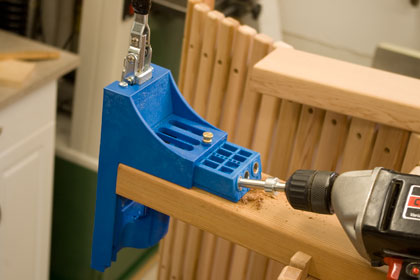

Kreg Jig® K3 Master System with FREE Large Face Clamp! ($29.99 Value!) Now the most fun begins, cutting plugs and then flush cutting them on the chair. 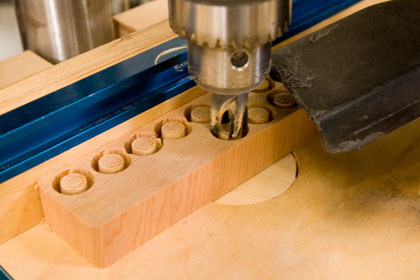
I used my handy dandy 3/8" plug cutter and made over 160 plugs for the two chairs. 
3-Pc. Self-Centering Plug Cutter Set I cut pieces from a 2" X 6" a little over 1" long and drilled the plugs into the end grain. 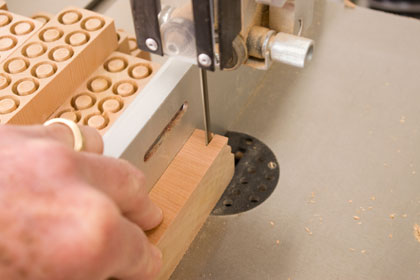
After they were all drilled I cut the bottoms off on the band saw. 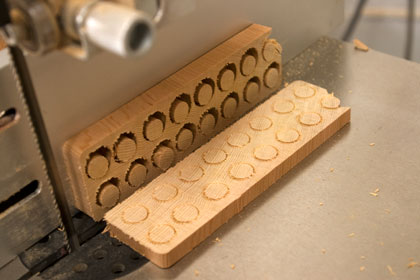
Apply a small amount of glue to each hole and gently tap the plugs until they stop. 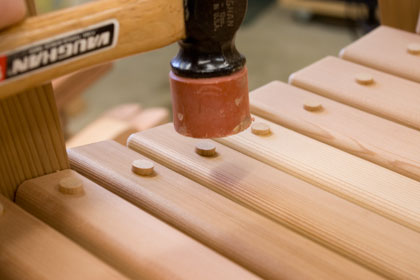
Once the glue is dried use a flush cut saw to carefully cut off the tops of each plug. 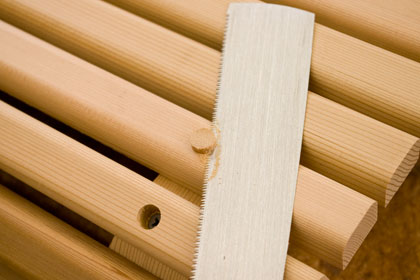

Dozuki Dovetail/Flush-Cut Saw I bought some cedar plugs for the pocket holes to fill them. I attached the hangers with 1/4" hardware using a carriage head bolts for the outside legs and round head phillips bolts for the inside base. 
The hangers came from Rockler and work quite nicely.
That's about it. We hope you liked this project. If you build it and your friends ask where you got such a clever idea, please tell them that you got it at RunnerDuck.com.
|
|||||


|
The AllAmerican RunnerDuck Review Visit our Blog, www.runnerduckreview.wordpress.com, and sign up to receive notifications when it is updated. Our newsletter is a monthly blog with woodworking projects, crafts, recipes, and more. When you get to our blog just enter your email address and click "Sign Me Up". This is what it looks like:

|