
For more great plans click on the banner below.
|

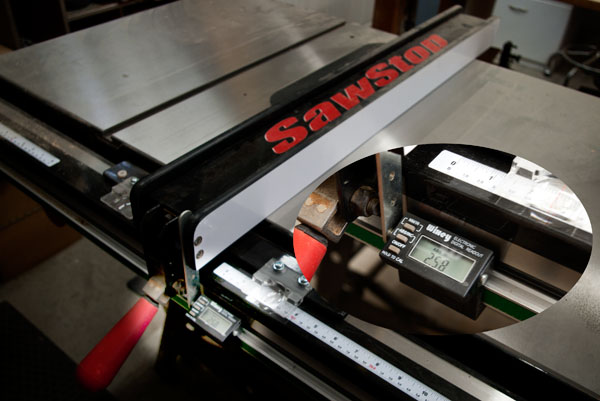
I purchased the Wixey Tablesaw Digital Read Out (DRO) because everything I had read about it sounded really good.
 Wixey Saw Fence Digital Readout
When it came I looked for ways to install it on my SawStop tablesaw and didn't find any instructions that looked like they would work. That prompted me to devise my own plan and it worked out great! According to the instructions that came with the unit you need to file down the edges of the ends on the extruded aluminum, this is to allow the DRO to slide smoothly when it traverses the joint created by the two extrusions.
 Next you join the extrusions (rails) with the supplied hardware.
 What makes the DRO work and provides the accuracy is the strip that get's bonded to the rail. It comes in two pieces and will be applied to the rail in two steps.
 First you remove the backing tape from the strip.

Carefully apply the strip to the rail. You only get one chance at this so be very careful to have it centered. I only peeled back a little bit of the backing tape at first and then pulled it back as I applied the strip.
 You press the alignment tool into the end of the second strip and then with the backing pulled back press the alignment tool into the first strip. Now here's where I start to deviate from the manufacturers instructions. I made four brackets to mount the rail to my SawStop.
 I used 3" "L" brackets mounted between my tablesaw and the rail.
 I drilled the holes out to accommodate the screws for my tablesaw and the hardware for the rail.

I cut the end of the "L" bracket with a hacksaw.

I laid the rail on the tablesaw fence rail and aligned the brackets the the existing holes in the bottom of the fence rail (thank you SawStop).
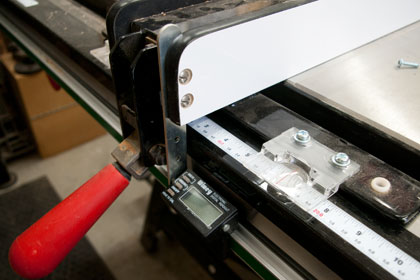
 With those I attached the rail to the tablesaw. The DRO module is attached to the fence by magnets located on each end of the module. A metal plate is provided that attaches to the fence.
 The SawStop fence is wood so I drilled a couple of holes for the metal plate.
 I attached the plate with two screws.
 I used nylock nuts on the screws to keep them from coming loose in the future.
 Wixey Saw Fence Digital Readout That was it and it works great! If you have a SawStop and would like to add a DRO to it these instructions should help. That's about it. We hope you liked this project. If you build it and your friends ask where you got such a clever idea, please tell them that you got it at RunnerDuck.com.
|
|
The AllAmerican RunnerDuck Review Visit our Blog, www.runnerduckreview.wordpress.com, and sign up to receive notifications when it is updated. Our newsletter is a monthly blog with woodworking projects, crafts, recipes, and more. When you get to our blog just enter your email address and click "Sign Me Up". This is what it looks like:

|