
For more great plans click on the banner below.
|
|
Our house that we've now lived in for two years had manufactured cabinets installed in the kitchen. They are OK and the shelves in the big cabinets slide out which makes access to things in the back quite easy. That is to say that all but one cabinet had this feature.
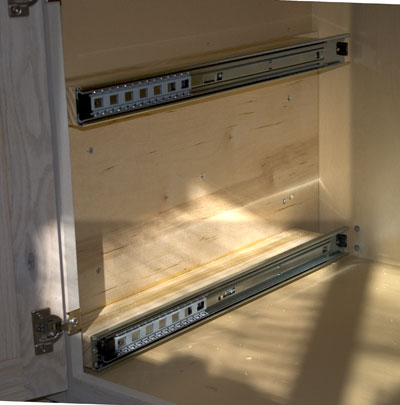
 I used full extension slides that would carry a good load so I didn't have to worry about the shelf sagging when it was extended.
 Centerline 100 lb. Full Extension Drawer Slides, Black Finish
I mounted the slides to the cabinet wall and took measurements to make the shelves.

Cut the front, back and sides to length.
 You could set up a dado blade but I used my favorite Freud General Purpose Blade.
 Freud® 10'' x 40T Hi ATB Premier Fusion General Purpose Blade
I set up a spacer on my fence as a guide and just made several cuts to clean out the dado.
 Spiral Mortising Router Bits
Lay out the frame and carefully measure to get the size for the bottom.
 Glue the ends but let the bottom float in the dadoed groove.
 Nail the ends with a brad nailer.
 Porter Cable Pin Nailer Kit
Clamp and square the shelf by measuring from corner to corner making sure that the dimension is the same both ways.
 These plastic squares work well also for squaring up your projects.
 Clamp-It™ Assembly Square 6-Pc. Kit
I slid the shelves into the cabinet and they fit perfect! That's about it. We hope you liked this project. If you build it and your friends ask where you got such a clever idea, please tell them that you got it at RunnerDuck.com. |
|
The AllAmerican RunnerDuck Review Visit our Blog, www.runnerduckreview.wordpress.com, and sign up to receive notifications when it is updated. Our newsletter is a monthly blog with woodworking projects, crafts, recipes, and more. When you get to our blog just enter your email address and click "Sign Me Up". This is what it looks like:

|


